
Setting up a virtual queue is easy. Running one well on a live event day is a completely different skill.
We've covered how virtual queues work and when to use them instead of timed ticketing. If you haven't read those yet, start there. For this blog, I’m going to assume you already know the mechanics and dive deeper into strategy & best practices.
Because what our other posts don't cover is what actually separates a smooth event day from a chaotic one: the dozens of small, real-time decisions someone on your team makes while the queue is live. The tool is only half the equation. The other half is knowing how to operate it.
Here’s how to manage your virtual queue like a boss, from setup through event day.
1. Set Your Ready Queue Buffer Size Before Doors Open
The "Ready" buffer is the number of guests staged and notified that it's their turn, before they've actually walked up to your entrance. Get this number wrong in either direction and you'll feel it within the first ten minutes of doors opening.
-
Too small, and your staff stands around waiting for the next notified guest to arrive, even though there's a full Waiting queue behind them. You're leaving throughput on the table.
-
Too large, and you notify people before you're actually ready for them; they show up, and now they're standing around waiting anyway, which defeats the entire purpose of a virtual queue.
Rule of thumb: your buffer size should roughly match how many people your entry point can process in the time it takes a notified guest to walk from wherever they were waiting to your entrance. If your gift shop or concessions area is a two-minute walk from the entrance and your staff can process four groups every two minutes, your buffer should sit around four groups…not one, not twelve.
Don't set this number once and forget it, either. Adjust it as the day goes on: a smaller buffer during a slow morning, larger heading into a predictable evening surge.

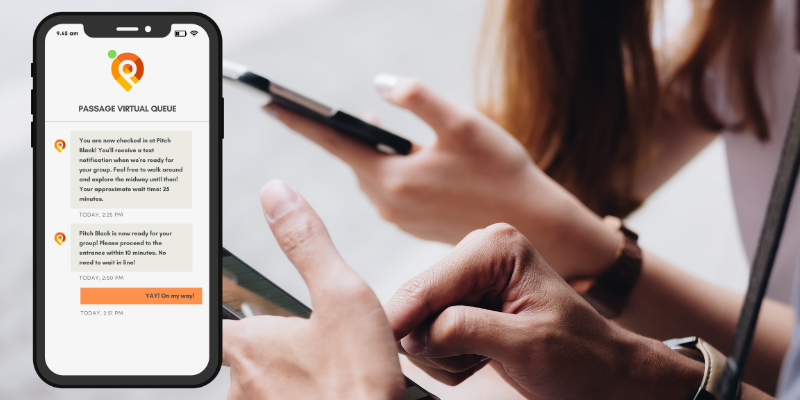
With Passage, guests can check themselves into your virtual queue, or you can require them to check in with a member of staff.
2. Auto-Advance vs. Manual Control…Know When to Use Each
Passage lets you automatically keep a set number of people in the Ready queue, or manage it manually. Most organizers treat this as an either/or decision. It shouldn't be.
Auto-advance is great for steady, predictable stretches of your event: a normal afternoon with consistent arrivals and no surprises. Let the system do the work.
Manual override matters most exactly when things get uneven: a parade just let out and dumped 200 people into your queue at once, a rain delay backed everyone up, or you need to pull a VIP group forward without waiting for the automatic rotation to get to them.
The best approach is running auto-advance as your default, with a staff member empowered (and instructed!) to manually override when conditions change. This is the same principle behind the dynamic VIP:GA ratios we covered in the last post: don't set a static rule and walk away from it. Set a sensible default, and give a real person the authority to adjust it when the moment calls for it.
3. Use VIP Prioritization Without Making It Obvious
If you're running a VIP tier, the star-marking feature is how you actually enforce the ratio and wait-time targets you set during planning. But there's a right and a wrong way to use it.
The wrong way: let VIP-starred guests pile up visibly at the top of your Waiting queue, all moved to Ready in one obvious batch. Even in a virtual queue, where there's no physical line for GA guests to stare at, a visible pile-up of priority guests being moved as a group can still feel like queue-jumping if guests can see queue position or notice a pattern.
The better way: stagger when VIP groups get pulled into Ready, rather than moving them all at once. This keeps your ratio on target over the course of the day without creating an obvious, resentment-triggering moment. It's the same "physical separation" fairness principle from the last post, just applied to timing instead of physical space. The goal is the same: let VIP guests move faster without turning it into a spectacle.

Guests can visit concessions, browse your gift shop, or enjoy midway activities while they wait in the virtual queue.
4. Handle No-Shows Without Stalling Your Flow
No-shows are where Ready-queue math quietly falls apart if you don't plan for them. A guest gets notified, doesn't show up in a reasonable window, and now you've got a phantom slot: your buffer thinks it's got room, but that group is still functionally "in" the queue.
Set an implicit grace period (a few minutes is usually enough) and have a clear rule for what happens after it expires: bump the group back to Waiting, or drop them and let staff manually re-add them if they turn up later. What matters isn't which rule you pick, it's that you pick one in advance and your staff knows it. Nothing kills queue flow faster than the person running Ready being unsure whether to skip a no-show or keep waiting on them.
5. Combine and Group Guests the Right Way
These are two different tools that solve two different problems, and mixing them up creates awkward moments at your entrance.
-
Combine Queue Members is for guests who bought tickets separately but want to enter together (say, two friends who each bought their own ticket online). Combining them merges their entries into one group so they're called up together instead of at two different times.
-
Group Queue Members is for fixed-capacity experiences (think: hayrides, tours, boarding groups) where you need a specific headcount each round. This lets you build a group whose quantities add up to your exact capacity, move them all to Ready at once, and still have each person get their own notification.
Using "Combine" when you meant "Group" (or vice versa) is a small thing, but it's the kind of small thing that leads to a hayride leaving with two empty seats or a group of friends getting split up at the door. Get your staff comfortable with the difference before doors open, not during the first rush.

Guests can visit concessions, browse your gift shop, or enjoy midway activities while they wait in the virtual queue.
6. Communicate Delays Before Guests Notice Them
We covered this in the last post: perceived wait time matters more than actual wait time. The same is true for virtual queues, and it's actually easier to manage here than in a physical line. You have a direct text channel to every guest.
Don't let your queue notifications be purely mechanical ("You are in the virtual line for [Event]. We'll message you again once your turn is up!"). During a normal stretch, that's fine. During a slowdown, it's a missed opportunity. Have a pre-written delay message ready to go, something like:
"Thanks for your patience — we're running about 15 minutes behind due to [weather / high demand / a technical issue]. We'll text you the moment you're up!"
Sending this proactively, before guests start wondering why their turn is taking longer than expected, does more for guest satisfaction than actually shortening the wait would. It keeps the process easy to understand: guests know something is happening, even if that something is a delay.
7. Staff the Queue Itself, Not Just the Entry Point
A common mistake: organizers put their best, most attentive staff at the physical entrance and leave the virtual queue dashboard (the thing actually deciding who gets called next) un-monitored or treated as a background task.
Someone needs to own the Waiting-to-Ready decisions and handle edge cases (no-shows, VIP staggering, manual overrides during a surge) in real time. This shouldn't be a side responsibility for whoever's closest to a laptop. Assign a dedicated point person for the queue itself, separate from your entry-point staff. On a busy day, this is a full-time job, not a glance-over-occasionally job.

8. After the Event: Let Your Queue Data Do Some Work
Once the event wraps, your virtual queue has quietly generated a dataset most organizers never look at: peak wait times, no-show rate, average group size, how long guests actually sat in Ready before entering.
That data answers real planning questions for next time…was your buffer size actually right? Did your VIP wait times hit the targets you set? Was there a specific hour where the queue backed up, and why? Pull this after every event and you'll spend less time guessing at your buffer size and staffing plan next time, and more time refining it.
A Virtual Queue Is a Live System, Not a "Set and Forget" Feature
The organizers who run the smoothest events aren't the ones with the fanciest initial setup…they're the ones making small, informed calls throughout the day: adjusting the buffer, staggering VIP entries, catching a no-show before it stalls the line, sending a delay text before anyone has to ask.
None of this requires more technology than what you likely already have. It requires a plan for how to use it, and someone dedicated to running it on the day.
Let Us Help You Run It
If reading through all of this made you realize your current setup is more "set it and hope" than "run it like a boss," that's exactly what we're here for. Passage's virtual queue tooling (with auto-advance, VIP prioritization, combine and group features, self-check-in) is the entire feature set this post just walked through, and our team will help you configure it for your specific event, not just hand you a generic template.
Schedule a call with an event expert and we'll set your virtual queue up with you, buffer size and all.