
.jpg)
Admission to your event doesn’t have to be one-size-fits-all. You may want to charge one price for adults and another for children.
It doesn’t have to stop there. Some events offer discounted prices for seniors, veterans, students, first responders, or other groups. With Passage, you can customize your tickets to offer as many different types of price points as you like. Here’s how to set everything up.
No time to do it yourself? Schedule an onboarding call with our support team and we’ll set everything up for
you!

1. Start by Navigating to the "Ticket Info" Section of your Event Details Page
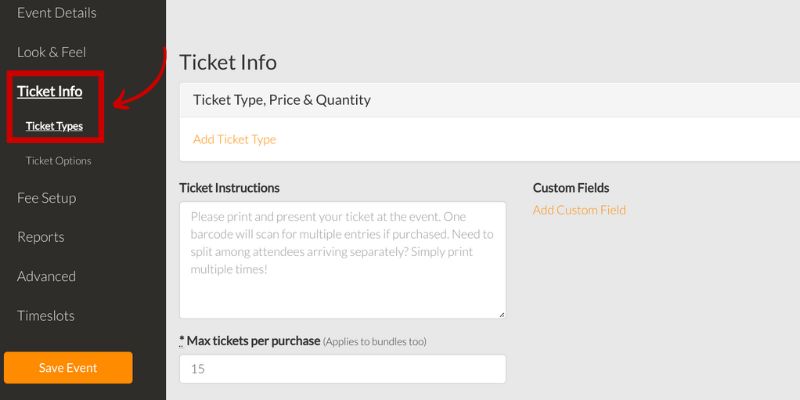
2. Click the "Add Ticket Type" Button in your Event Settings

3. Name the New Ticket Type
Try to make it a unique name that guests will recognize, such as “Youth” or “Senior”.
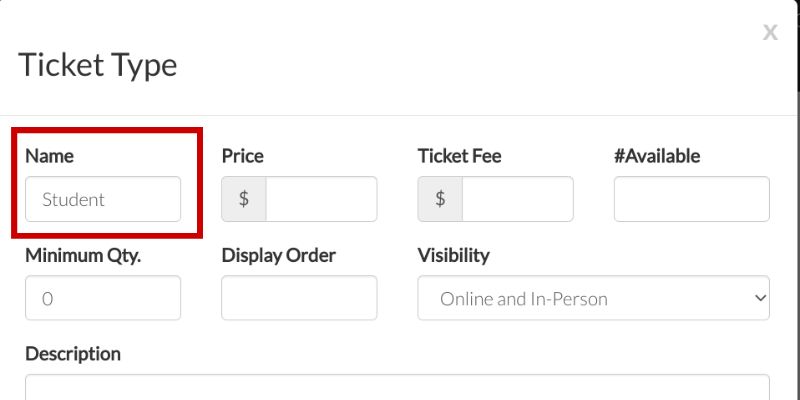
4. Give It a Price, a Description, and Set the Display Order

Display Order: This is the order in which you want the ticket type to appear in the list. "1" is listed first, "2" is second, and so on. You may want General Admission to appear first, for example, followed by VIP passes, then student tickets.
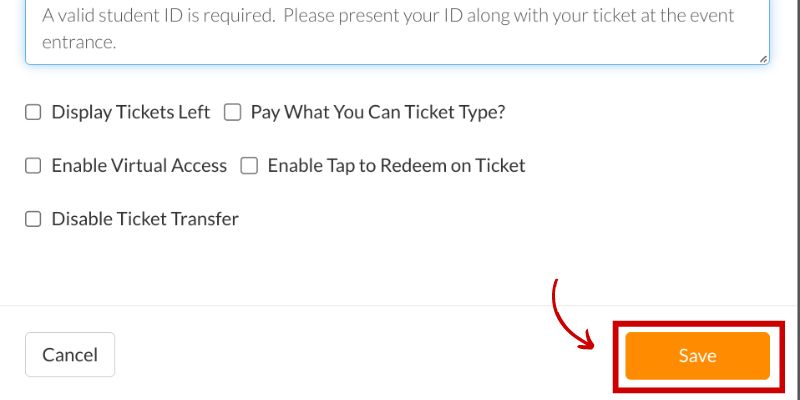
Description: Let your customer know what they get with this ticket option ("Skip the ticket line," "Attend a meet and greet after the show," etc), or if there are restrictions on who can use this ticket ("Ages 18+", "Ages 5 and under", etc).
5. Save your Ticket Type
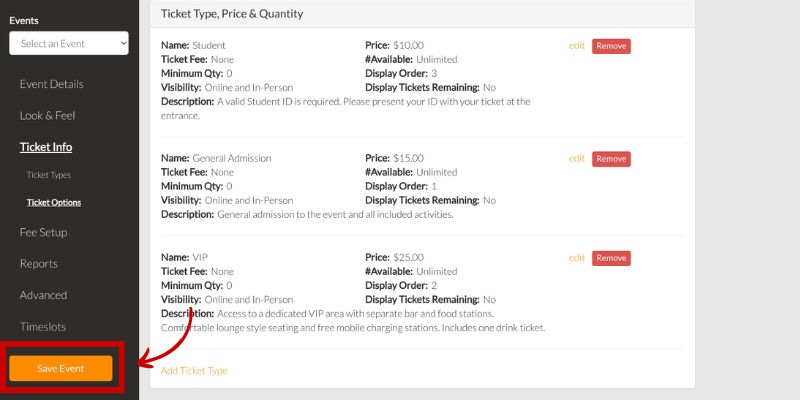
6. Save your Event
What If I Have a Limited Number of Tickets Available? Will They Come Out of the Same Inventory?
Let’s say you have 100 tickets available for your event, but you want to offer several different types of tickets like general admission, VIP, and child admission. You don’t know exactly how many of each ticket type you’ll sell, but you can’t sell more than 100 total.
There’s a simple way to tie all of your ticket types together into one inventory! You can do that by setting the quantity available in your time slot.
Even if you only have one time slot available, tying your ticket types to a time slot will pool all of them into one inventory so you never oversell your venue.
1. Navigate to the Dates & Times Section of your Event Details
2. Enter the Time Slot Details
You’ll need to enter a start and end time for your time slot. You can also choose to select a date and time when ticket sales will begin and when they will end. If you enter a date & time in this section, tickets will only be available between the start/end times you select.
.jpg?width=800&height=400&name=Students%2c%20Kids%2c%20and%20Seniors%20Pricing%20Blog%20800x400%20px%20(5).jpg)
3. Enter a Ticket Limit and Select the Ticket Types
Your Ticket Limit will apply to all tickets sold for this time slot, regardless of ticket type. Then, you’ll see a series of check boxes for each ticket type you have created. Simply check the boxes that you want to include in the ticket inventory for this time slot.

Ticket-types are capable of spanning different time slots. You can set up one Youth ticket type, for example, and make it available for any time slots you set up.
This feature is incredibly flexible, so your imagination is the only limit!
Need help setting up different ticket types for your next event? Schedule an onboarding call with our support team; we’ll set everything up for you!