
Whatever type of event or venue you’re operating, you’re probably not doing it alone; most of us get a little (or a lot of) help from employees and/or volunteers. You may have staff help with scanning tickets at the door or checking in guests, maybe even selling admission and merchandise.
But you might not want the new volunteer scanning tickets at the door to be able to edit your event or accept money from guests. At the same time, you might want to send accounting information to your bookkeeper or tax preparer, without giving them access to modify your venues.
The solution? Setting individual permissions for each of your staff and volunteers. It’s easy to do with your Passage account, and it has several benefits.
1. It makes things simpler for the staff member. They won’t be overwhelmed with a lot of choices, which makes it easier to focus on the job at hand.
2. It also helps prevent mistakes – like a volunteer accidentally changing the time of your event instead of changing the timeslot of tickets they’re scanning.
3. It keeps your account and your business information more secure.
With Passage, setting up employee permissions is simple. The first thing you’ll want each employee to do is to create their own account on Passage. They can do that by following this link: https://app.gopassage.com/users/event-creator-sign-up.
Now you’ll be able to give them access to specific parts of your events. You can even change their permissions among all of your venues if you operate multiple events.
Step #1
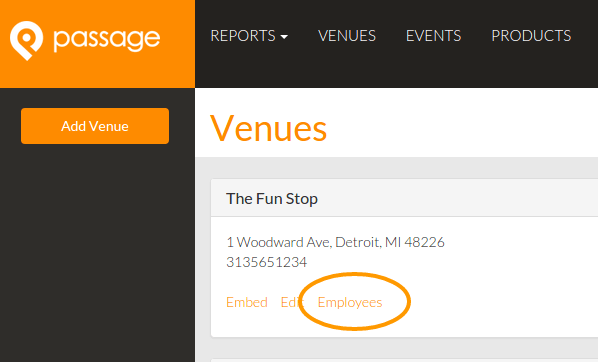
Head over to the “Venues” tab on your admin dashboard. Select your venue, and click the “Employees” link listed under your venue’s address.
Step #2
Click the “New Employee” button and enter the account email of your employee or volunteer.
Step #3
Finally, you’ll want to choose their level of access. Here are your options:
Mobile App Access
- None: Employees cannot use the Passage Manager app for your venue’s events.
- Scan: Employee may scan tickets into the event to redeem, but may NOT unredeemed a customer’s tickets or sell tickets in-person.
- Scan/Return: Employee may scan tickets in or out of the event to redeem or unredeemed, but may NOT sell tickets in-person.
- Scan/Return/Sell: Employees may scan tickets in or out of the event to redeem or unredeemed, as well as sell tickets at your event in person.
Web Admin Access
- None: Employee cannot access your admin account or event info on the website.
- Event Creator: Employee may create new events and edit event info including ticket types, event times, and description. However, they may not view reporting for event ticket sales.
- Reporting: Employee may view reporting for all event ticket sales. However, they may not create new events or edit existing events.
- Both: Employee may create new events and edit event info, and view reporting for all event ticket sales.
Step #4
Click “Add Employee” and you’re all set!
You can always change the access level for any team member at any time. So if someone gets promoted from ticket scanner to team manager, for example, you can adjust their event permissions accordingly in real time.
How do you use Employee Access for your events? Let us know in the comments!